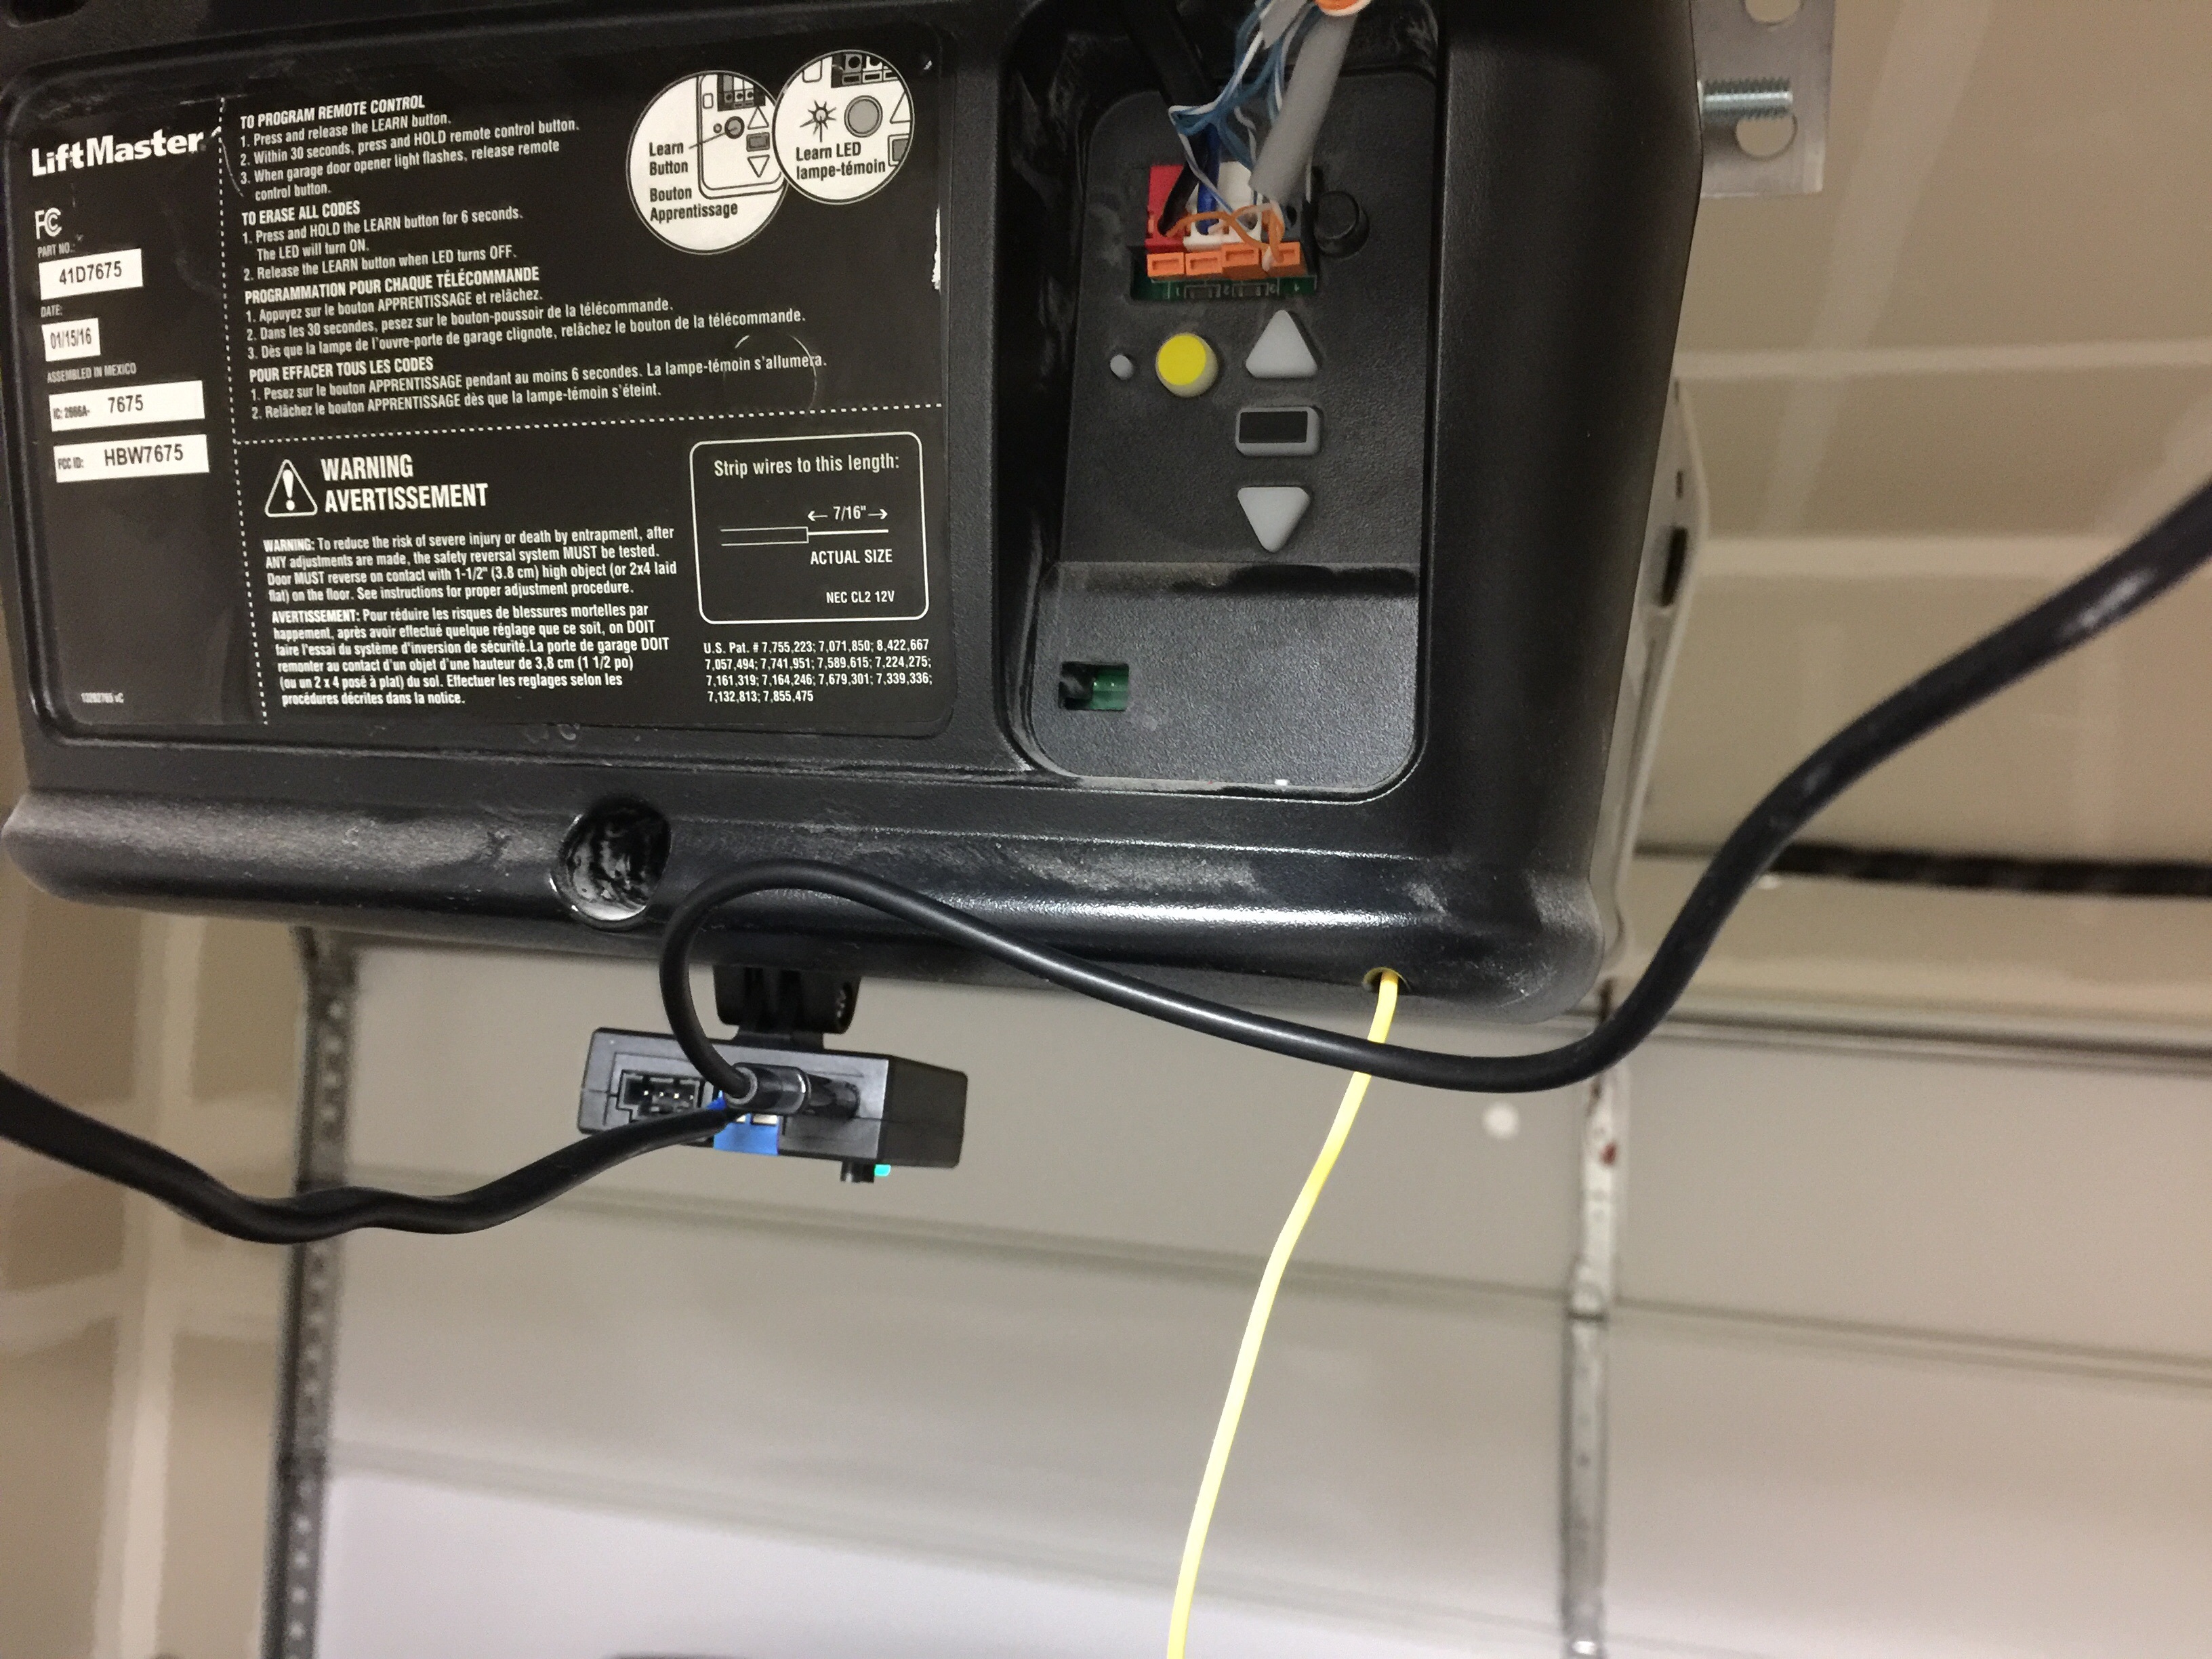
How To Disengage Wires On My Liftmaster Garage Door
Installation With Liftmaster Opener Wiring Openers Garadget Community

Liftmaster Garage Door Opener Sensor Wiring Electric Garage Doors Liftmaster Garage Door Opener Garage Door Sensor

Liftmaster Wiring Garage Door Sensor Wires Garage Door Opener Wiring Check More At Https Myhothack Pw Garage Door Sensor Garage Doors Chamberlain Garage Door
Garage Door Opener Flashing Led Light Door Not Moving
7881 Part 15 Spread Spectrum Transceiver User Manual 114a4503 Indd Chamberlain Group The

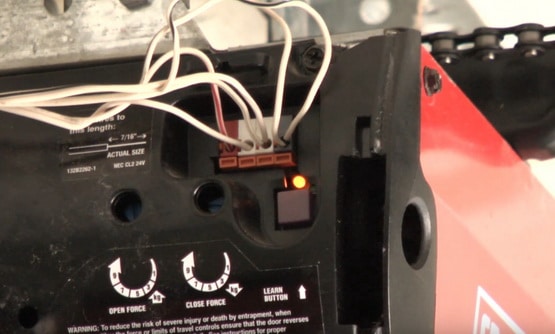
Liftmaster Chamberlain Part 41a4252 6g Garage Door Circuit Board
If done correctly you ll have disconnected your safety sensors from your garage door.
How to disengage wires on my liftmaster garage door.

Garage Opener Light Blinking A Troubleshooting Guide Garage Door Medics
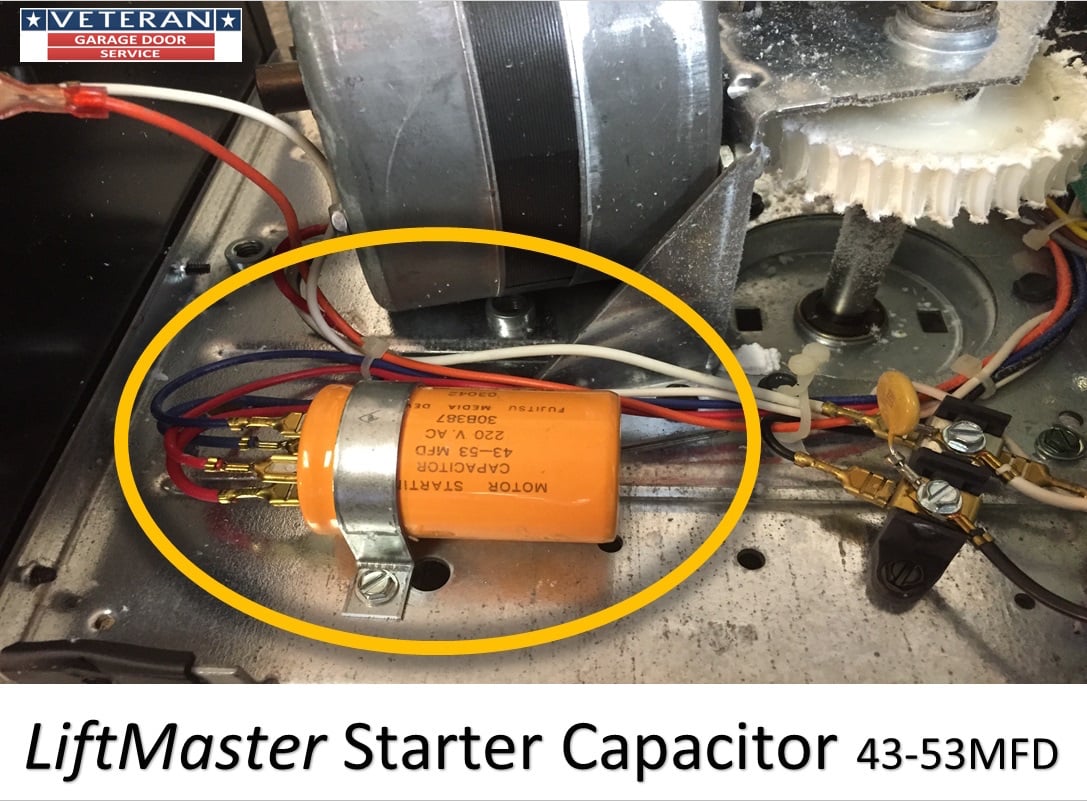
Replace The Starter Capacitor On A Garage Door Opener

12 Garage Door Electrical Wiring Diagram Liftmaster Garage Door Liftmaster Garage Door Opener Garage Doors

Repair Garage Door Sensor Garage Door Repair Deluxe Door Systems
Source : pinterest.com
